Category Archives: cook

Artichokes

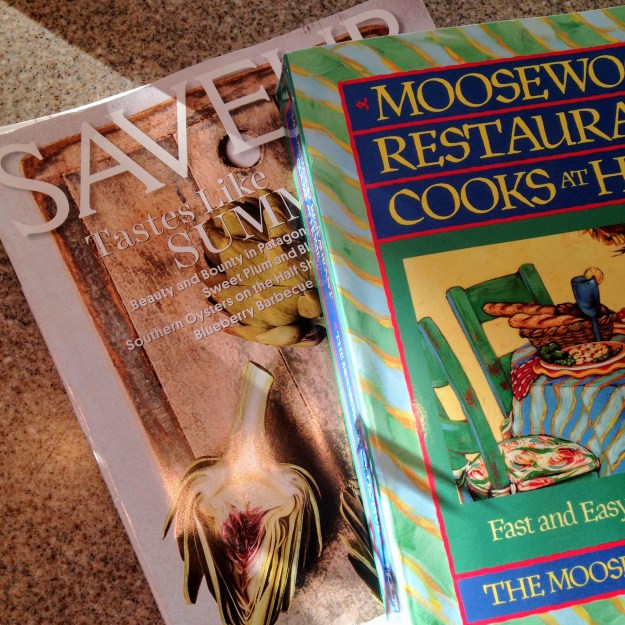
Artichokes are so dramatic, in all their spiky mystery. Last summer, Saveur magazine went so far as to feature them on the cover, split in half so you could see their inner workings. There are, of course, the jarred and marinated artichoke hearts that surface in pasta salads and various chicken dishes, but that’s not what I’m referencing here. Some recipes call for frozen artichokes, which I have never found, but generally replace with canned artichokes. These flavors are familiar, but I believe a real artichoke experience can only be found by eating one whole, leaf by leaf, as a sort of vegetable adventure.

img_4868

As a kid, we would occasionally have artichokes for dinner – in my memory, they would emerge from a steaming pan, sprinkled with minced garlic. We would pull off the leaves, capturing the delicious meat of each one by scraping with our teeth, and tossing the inedible parts into a central discard bowl. When you got to the center, and navigated around the prickly choke itself, you were rewarded with the heart – a dense chunk of deep but subtle flavoring; the prize inside the vegetable. There was a garlicky mayonnaise to dip everything into, and a real sense of accomplishment to be gained.

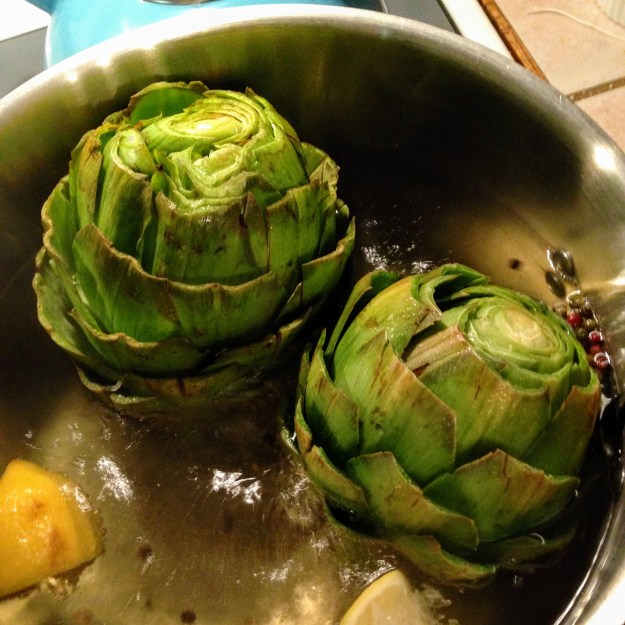
As a grown up, I’ve tried a few times to recreate this experience. I’ve known how to prep them – turned on the side, it’s easy to trim 1/4 inch off the artichoke stem and about the same off the top. Kitchen shears are handy for clipping the barbs off the remaining leaves, and with that, they’re ready to cook. I tried steaming them, stem down, and it took close to 90 minutes. I tried steaming them stem up, which was faster, but didn’t allow for any seasonings to nestle in between the leaves as I remembered. I’ve also looked up aioli recipes, and they tend to begin at the raw egg stage, where I want them to begin at the mayonnaise stage. I’ve felt each of these times that I was not quite achieving the goal.

Last weekend, with the assistance of the Moosewood cookbook I’ve had for more than 15 years, everything came together. To my surprise, it includes both “Easiest Artichokes” and “Aioli” recipes – and the suggestion that they be paired. They recommend settling the prepped artichokes, stem down, in about 4 inches of boiling water – and adding whatever seasonings you like to the water itself or sprinkled over the top. In this arrangement, a significant amount of artichoke was above water, but almost immediately, a delightfully artichoke-y steam began sneaking out from the edges of the lid. Half an hour later, they were ready!

img_4861

Eating an artichoke necessarily slows down a meal and makes it an event. As you work your way through the tough outer leaves, dipping each into the aioli and only eating the edible parts, each bite gets more tender and delicious. When the leaves give way to the poky, feathery, choke at the center, try to pull it back from the edges gently. With a lot of patience and the steady pressure of a butter knife, it is possible to extract and discard the entire choke without cutting into the heart at all – think of this as a culinary challenge. The same caution should be taken when trimming away any tough bits on the stem end, as you want to salvage as much of the heart as is possible (to eat, obviously).

The aioli recipe began with a cup of mayonnaise, and the addition of a bit of garlic, lemon juice, and olive oil resulted in an intense and perfectly complementary dipping sauce for the artichokes. There was more than we needed for the meal, but the leftovers have improved our sandwiches all week.

Whole artichokes for dinner are delicious, and surprisingly easy to make. California artichokes (which you’ll find at your grocery store, probably nestled in a small basket next to the eggplants and leeks) are at their peak from March to May. Select those that are about the size of a grapefruit, and primarily pale green in color. Here are the recipes, adapted slightly from the Moosewood Restaurant Cooks at Home:

Easiest Artichokes

  • 4 whole artichokes
  • optional, to flavor the cooking water: any combination of bay leaves, peppercorns, lemon juice, vinegar, garlic, capers, or fennel seeds
  • optional, to drizzle over the cooked artichokes: juice of 2 lemons, and 4 tsps of olive oil

Bring 4 inches of water to a rapid boil, add whatever flavorings you choose, and trim either end of each artichoke to create a flat base and a flat top. Clip the barbed leaf tips for a nice look – though they will soften when cooked.

When the water boils, ease the trimmed artichokes, stem end down, into the pot. Cover, lower the heat, and simmer for 25-40 minutes, until the bottoms of the artichokes are easily pierced with a fork and the leaves are easy to pull off.

Drain the artichokes, place them upright on a serving plate, and drizzle lemon juice and olive oil over them if you like. Serve immediately (or, chill them and serve later – they’ll last for a few days in the refrigerator if stored in a tight container).

Aioli

  • 1 cup mayonnaise
  • 3 Tbsp fresh lemon juice
  • 2 Tbsp olive oil
  • 3-4 garlic cloves, minced
  • black pepper to taste

In a small bowl, combine all ingredients. Cover and refrigerated, aioli keeps for about a week.

Fruit Cobbler

2011-08-09 20.25.35_Chicago_Illinois_US

Cobbler isn’t pretty, but this bakery dessert tasted good and looks nice.

Fruit desserts are my favorite sweet option. I like the tiny jewel-like things that fancy bakeries always have on display, but those are beyond my repertoire. Cobblers are more my speed. My mom made a blueberry peach cobbler when I was growing up, usually in the winter, I think, because I remember that she used frozen blueberries and canned peaches. A note about blueberries: frozen or fresh, she always used the low-bush ones from Maine (for muffins, and pancakes, and on cereal, too) not the giant high-bush ones that are easily found in the grocery store each summer. It isn’t just a size difference. Have you ever compared an apricot with a peach? The flavor and texture and general soul differs. The same can be said for blueberry varieties. The little ones are sold frozen in the Midwest, if you do your research or manage to stumble upon them. I also suspect they grow in Minnesota and Wisconsin, but I don’t have a direct source for such delicacies.

In any case, I tried following the cobbler recipe a few times in my early years of cooking. I would go out of my way to obtain peaches and blueberries (canned and frozen, respectively), opting for a different recipe entirely if I didn’t have those two types of fruit on hand. Once I forgot to drain the peaches, which made the whole thing a bit more like soup than cobbler, though it didn’t harm the flavor. I’ve tried doubling the crust, because it is delicious – but then it comes out of the oven baked unevenly, with big spoonfuls of raw batter sitting in the boiling fruit. With patience and more attempts (or using a different recipe entirely), I could probably get the temperature and timing right to make the double batter version work, but in the meantime I’ve gone back to the original ratio.

Where I have successfully improvised with this recipe is through the somewhat recent realization that this is really a fruit cobbler recipe, and any 3 cups of fruit will do (though a combination of berries and stone fruit usually turns out best). Frozen, canned (remember to drain the fruit, in this case), or fresh is fine. This is ideal in summer, when you’re awash in berries you can’t eat fast enough – or in winter, when a fruit dessert is just the thing to boost your spirits. I have a “leftover strawberries and blackberries that won’t otherwise get eaten, topped off with a nectarine to make 3 cups” cobbler in the oven right now, and it smells incredible.

Over the weekend, I visited my sister in Seattle and she made an incredible apple-rhubarb cobbler, entirely using fruit freshly picked from her backyard. We discussed our mutual preference for fruit-on-the-bottom cobbler, as we’ve discovered that some people actually make fruit-on-top cobbler. Hers was delicious, but I forgot to get the recipe (which I think was from her King Arthur Flour Baking cookbook), and so I’m making my old standard this evening. Here it is, in case you’re inclined to give it a shot:

Blueberry Peach Cobbler 

  • 1 Tbsp cornstarch
  • 1/4 cup brown sugar
  • 1/2 cup cold water
  • 2 cups peaches, cut into bite-sized chunks
  • 1 cup blueberries
  • 1 Tbsp butter
  • 1 Tbsp lemon juice
  • 1/2 cup flour
  • 1/4 cup sugar
  • 3/4 tsp baking powder
  • 1/4 tsp salt
  • 1/4 cup milk
  • 2 Tbsp vegetable oil
  • 2 Tbsp sugar
  • 1/4 tsp nutmeg

Preheat the oven to 375.

Combine the cornstarch, brown sugar, and cold water in a saucepan on the stove. Heat on medium, whisking until thick. Add peaches and blueberries (or whatever 3 cups of fruit suits you), the butter, and the lemon juice. Stir together and heat until everything seems nicely mixed up and somewhat thick and bubbly and smelling nice.

Meanwhile, in a separate bowl, mix together the flour, 1/4 cup of sugar, baking powder, and salt, stirring well. Add the milk and oil and stir until smooth. In yet another small bowl, stir together the 2 Tbsp of sugar with the nutmeg.

Pour the fruit into a casserole dish, and pour the crust over the top (spread out to cover all the fruit, so that it bakes evenly). Sprinkle the sugar/nutmeg mixture around the top, and bake for 30 minutes.

Eat while warm, with or without a splash of milk (or cream!). Save some leftovers for breakfast, if you have that sort of willpower.

Eggs

Last spring at about this time, we got a few chicks. Our permit allows us up to five chickens, and we read that each one might lay as many as four eggs per week. We figured that 20 eggs a week would be a lot, but our permit also says that we can not sell any of these eggs. I started stocking up on egg recipes right away.

We got a brown chick (named Henny Penny, who is an ISA Brown) and a black chick (named Ruby, who is a Wyandotte). The next week we got three more, but only two of them survived. Those two are known, somewhat interchangeably, as Ariel and Cinderella (an Easter Egger and an Australorp). The fifth one, the chicken that didn’t make it much past 48 hours on our watch, was a chirpy little thing, stumbling around in bursts of tiny energy and squawking a lot. It appeared to be blind, but boy did it have spirit. We named it Ray Ray, in honor of Ray Charles but with a nod towards the fact that we’d requested only female chicks (as roosters are not welcome in our neighborhood). RIP, Ray Ray.

We have a spectacular chicken coop, well-constructed and fully insulated. It’s built along one end of our raised bed garden, with a screened-in run and a roost that is easily accessed for egg gathering. I should dedicate an entire post to how fantastic that whole structure is, actually, and how impressive the concept and creation of it was last spring, but let’s stay focused on eggs for the time being.

Chicken Coop

Egg production was sporadic, all summer and fall. For a long time, it seemed that only one chicken was laying eggs – Henny Penny is the biggest and bossiest of the crew (pecking order is real) and I once opened the egg collection door while she was on the roost. That’s when I learned that a seated chicken, from the back, appears to be a pyramid of tail feathers. Her eggs look very much like the brown ones you can get at the grocery store. At some point last summer, there also started to be eggs that were slightly less brown, and a little freckled. Our Easter Egger was supposed to lay blue and green eggs (appropriately IMG_3530named), but didn’t do so until well into the winter. Our chickens took so long to ramp up that we didn’t really notice a decline in production during the colder and shorter days of winter.

Production has increased in the last week or two, which is a nice reminder that our food really is tied to the earth and the seasons. It feels vaguely springy to me, and so it must to our chickens, as well. We are gathering about four eggs every day, of various sizes and colors. And so, a year into having chickens, I have turned to the egg recipes that I gathered in anticipation of this moment. The frittata was really easy, the souffle a bit more complex, and both were delicious.

***

Ham and Peas Frittata – adjusted from a Real Simple recipe

Ingredients:

  • 3 tablespoons extra-virgin olive oil
  • 1 cup frozen peas
  • 1/4 pound thinly sliced ham, cut into 1-inch pieces
  • 8 large eggs
  • 3 tablespoons milk
  • 1/4 cup grated Parmesan
  • 1/4 teaspoon black pepper

Directions:

Heat oven to 350° F. Heat 1 tablespoon of the oil in an ovenproof nonstick skillet over medium heat. Add the peas and ham and cook, stirring, for 3 minutes.

Meanwhile, in a medium bowl, whisk together the eggs, milk, Parmesan, and pepper. Pour into the skillet and stir.

Bake until browned around the edges and puffed (a knife should come out clean), 15 to 20 minutes. Cut the frittata into triangles and serve with salad.

***

Cheese Souffle – adjusted slightly from Mark Bittman’s How to Cook Everything

IMG_3533

Ingredients:

  • 4 Tbsp butter, plus 1 tsp
  • 1/4 cup flour
  • 1 1/2 cup milk, warmed until hot to the touch
  • 6 eggs, separated
  • salt and pepper to taste
  • 1/2 tsp dry mustard
  • 1 cup finely shredded cheddar

Directions:

Heat the oven to 400° F. Grease a deep 2-quart baking dish with the teaspoon of butter. Warm the milk, separate the eggs, and grate the cheese. Once you start this recipe, things move quickly and you’ll need to be ready.

Place a medium pan over medium heat and add the remaining butter. When it foams, add the flour and turn the heat to medium-low. Cook, stirring, until the mixture darkens a bit, about 3 minutes. Whisk in the milk a little at a time to avoid lumps, then cook until the mixture is thick, just a minute or two longer.

Turn off the heat and stir in the egg yolks, salt, pepper, mustard, and cheese. Beat the egg whites with a pinch of salt, just until they hold soft peaks. Stir a coup of spoonfuls of the beaten whites into the batter, then very gently – and not overly thoroughly – fold in the remaining whites, using a rubber spatula. Be as gentle as possible.

Turn the batter into the prepared dish and bake until the souffle has risen and is browned on top, about 30-40 minutes. Use a thin skewer or knife to check the interior; if it still wet, bake another 5 minutes. If it is just moist, the souffle is done. Serve immediately.

***

Photo credits: mine!

Simply Recipes

There is a blog, called Simply Recipes, that is reliable in every way. It is appropriately named, it is well maintained, and every recipe I have tried has met my every expectation. The clever woman behind the effort is Elise Bauer, and I like to think that if we lived near each other, we would be friends. It seems she was one of the first people who blogged about recipes, which must be how she got such a straightforward name for her website. She takes all the pictures, tries all the recipes before sharing them (or creates them herself), provides clear direction and suggestions, and posts regularly. Her recipes are organized by season and by ingredient and by category, and easily searched.

I have made a lot of her recipes, and with great success. I also find that if I’m stumped about what to make, browsing around on her website is a quick way to get inspired or to chase down a good idea for a particular ingredient. Here are some of my favorites, directly linked in the hope that you will explore her whole website yourself. Enjoy!

Chicken Piccata – an easy way to make chicken seem fancy.

Cajun Chicken Salad – one of my favorite things to have on hand for lunch!

Stuffed Zucchini with Turkey Sausage – a huge hit last summer, and a great way to manage more than one monster zucchini!

IMG_2682

Yes, this enormous vegetable did grow in our garden.

Grilled Skirt Steak Skewers – hands down the best grilled meat that I have assisted in preparing.

Hamburger and Macaroni – basic, cozy, delicious.

Franks and Sauerkraut Paprikash – hotdogs and sauerkraut and sour cream! Hurrah!

Poached Salmon – just as promised.

Easy Coconut Shrimp Curry – versatile and quick!

Spring Minestrone Soup – each spring, I look forward to making this flavorful soup.

Pickled Beets – a nice side dish, or addition to salads.

Zucchini Bread – reason enough to grow zucchini again this summer.

Tomato Soup

Tomato soup of any kind is particularly good with a grilled cheese sandwich, but as a kid it was once served to me in a large warming dish with hotdogs floating in it. Whole ones. Our babysitter that summer was a teenager with younger siblings and a father who was out of work at the local paper mill (by way of either a shutdown or a union strike), so when we ate lunch at her house there were a lot of people around the table. I can’t imagine how many cans of Campbell’s went towards that effort, or of what size, but it made an impression. I don’t remember her mother being present, and it occurs to me now that her salary and that of my teenage babysitter was keeping the family afloat that sunny summer day. To my surprise, the concoction simply tasted like hotdogs and tomato soup, individual items served in one dish.

I really liked that babysitter. She had her driver’s license and access to a car, and a membership to one of those music subscription services where you placed orders by writing tiny numbered codes onto a postcard and mailing it in. She had accidentally ordered an En Vogue tape when she meant to order Vogue, and this qualified as a very exciting mistake, worthy of much discussion. She had a chatty friend with red hair whose boyfriend was about to be deployed, and to think now that they were all about 17 that summer is an odd realization.

These days, I listen to a lot of podcasts in the car, and I’ve been enjoying the Splendid Table a lot lately. I recently caught Lynne Rosetto Kasper interviewing Tom Douglas, a (many times James Beard award-winning) chef from Seattle. They were talking about a delicious and simple tomato soup, cooking through the conversation. Intrigued, I looked up the recipe, and it is a keeper. The beauty of it, really, is that with a very little bit of planning (you need cream and two 28 oz cans of whole tomatoes), a well stocked cabinet (onions and garlic, a dash of celery seed), and about 20 minutes, this recipe can be made any time. My friend Brooke enjoyed it enough at my house to make it herself the following week, and she reports back that it was a success. I suggest using an immersion blender, if you have one. Floating hotdogs, optional.

Photo, my own.